In this beginner’s guide, we will walk you through the process of creating a MetaMask wallet and also a step-by-step on how to add a custom network for additional blockchains.
As you venture into the realm of decentralized finance (DeFi), explore NFTs, or simply manage and transfer Ethereum-based ERC20 tokens, a compatible wallet is essential. MetaMask, boasting over 21 million active users, is one of the most widely-used wallets in the market.
MetaMask serves as a free and user-friendly web3 hot wallet, granting access to a variety of popular DApps and Web 3 services. Initially designed as an Ethereum wallet, MetaMask also offers seamless integration with other blockchains like Avalanche and Polygon.
So, let’s dive into how to setup and create a MetaMask account.
How to Create a MetaMask Wallet?
This beginner’s guide will explain how to create a MetaMask account using a Chrome browser. However, the process is similar if you use Brave or Firefox browser. Once you have created your MetaMask wallet, you can also connect a hardware wallet such as Ledger or Trezor.
- Add MetaMask to Your Browser
- PIN MetaMask Extension to Your Browser
- Create a MetaMask Account
- MetaMask Usage Data
- Create a Secure Password
- Store Your Secret Recovery Phrase
- Confirm Secret Recovery Phrase
- MetaMask Account Created

Step 1. Add MetaMask to Your Browser
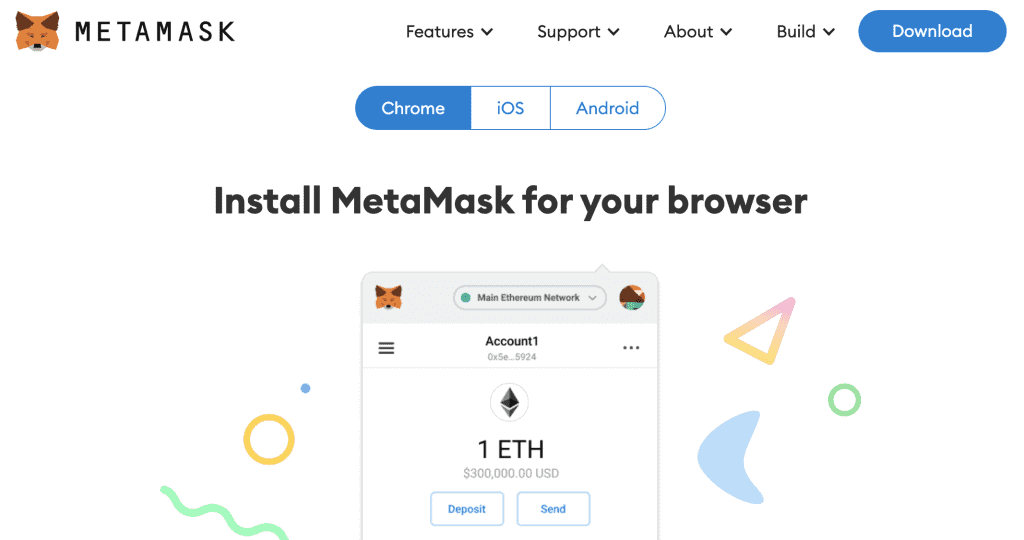
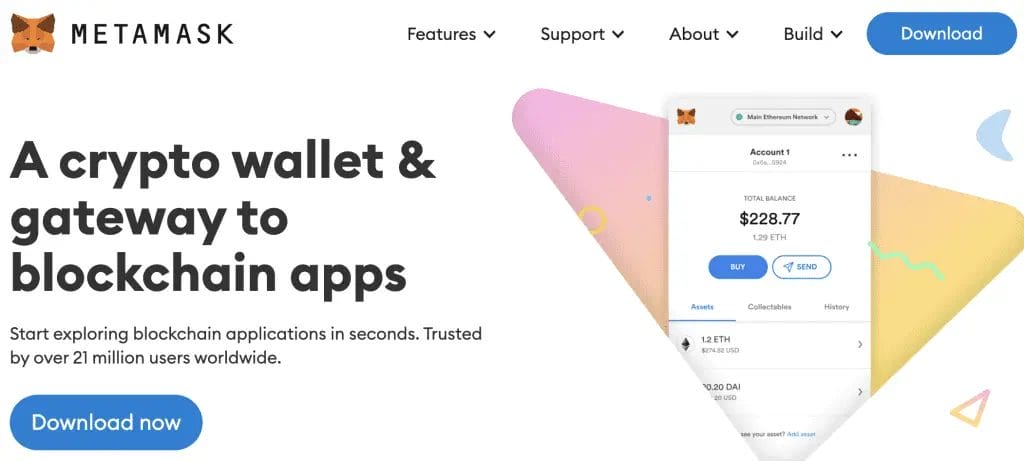
Navigate to MetaMask.io and choose “Download“. You will then need to choose your operating system, as you can see in the example below (Chrome, iOS and Android). Then click “Install MetaMask for Chrome” at the bottom of the screen.
Step 2. PIN MetaMask Extension to Your Browser
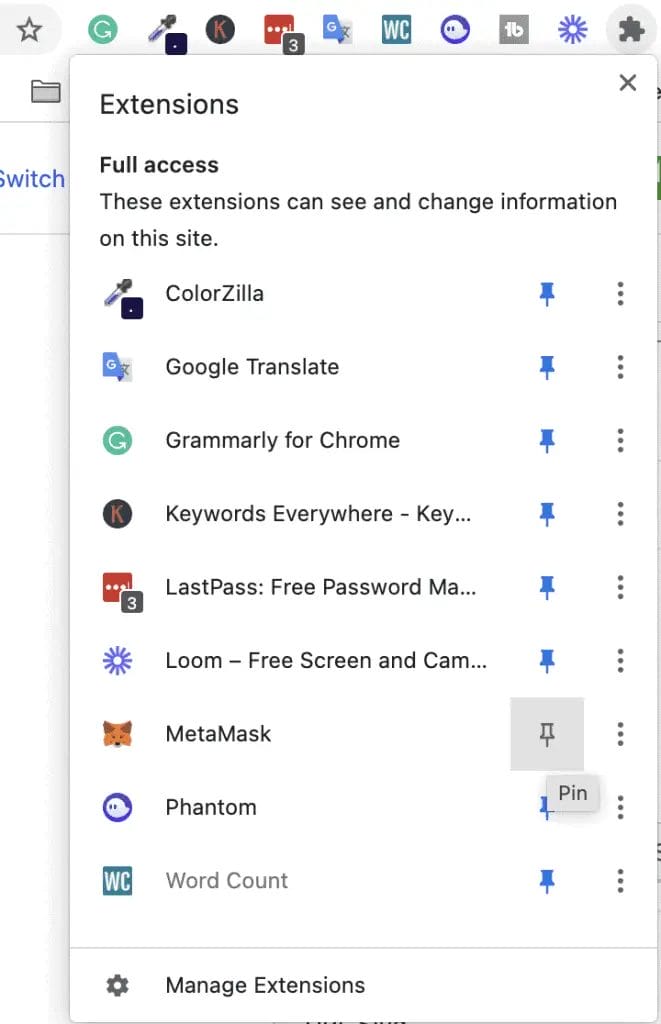
If you have chosen to install MetaMask for your browser, we’d recommend pinning the MetaMask extension to your browser. This will make things a lot easier and ensure you’re using the correct application.
Tip: If you’re using Chrome, you will see a “Puzzle icon” in the top right. Click the “Puzzle icon” and then choose “Pin” beside MetaMask.
Step 3. Create a MetaMask Account
Once MetaMask has been added to your browser, you can choose “Get Started“.
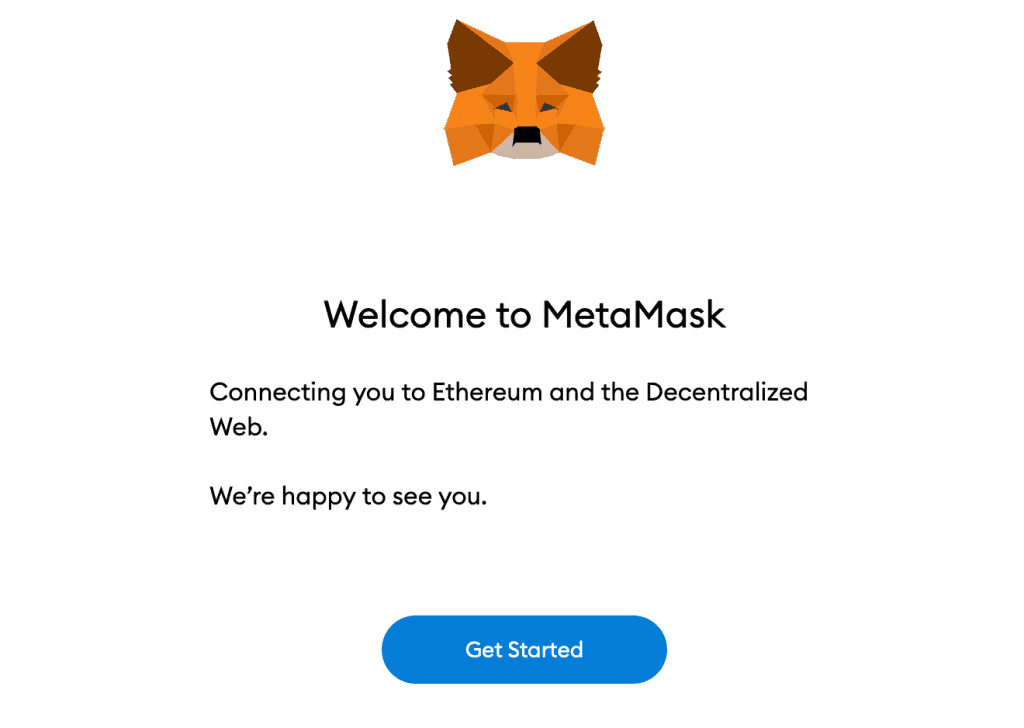
Step 4. Create a MetaMask Wallet
You will be given two options, “Import Wallet” or “Create a Wallet“. As this is the first time you’re creating a MetaMask wallet, you will need to select “Create a Wallet“.
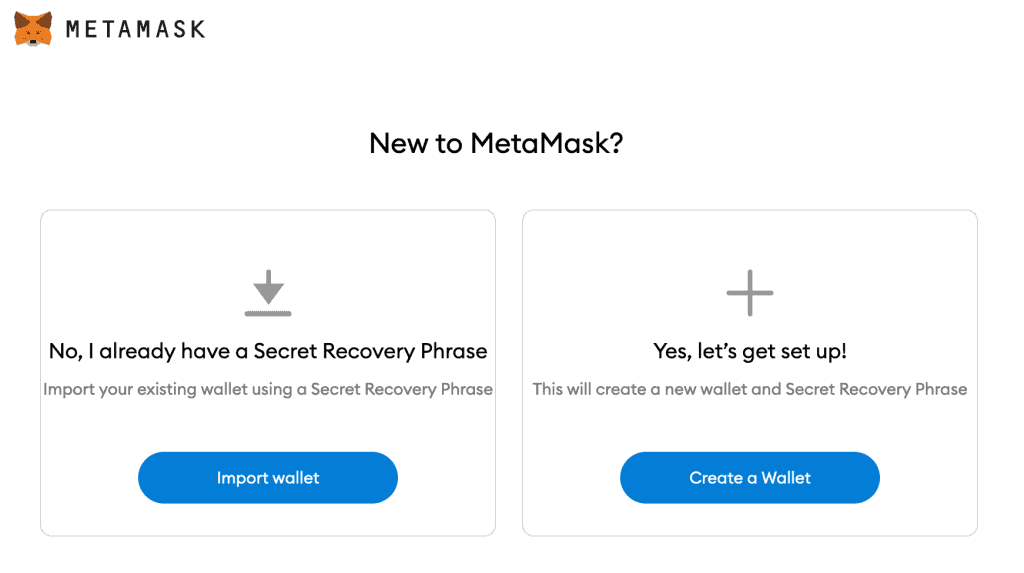
Step 5. MetaMask Usage Data
MetaMask will request that you allow them to gather usage data to improve usability and user experience. This is optional, and you will need to decide to choose “I Agree” or decline by choosing “No Thanks“.
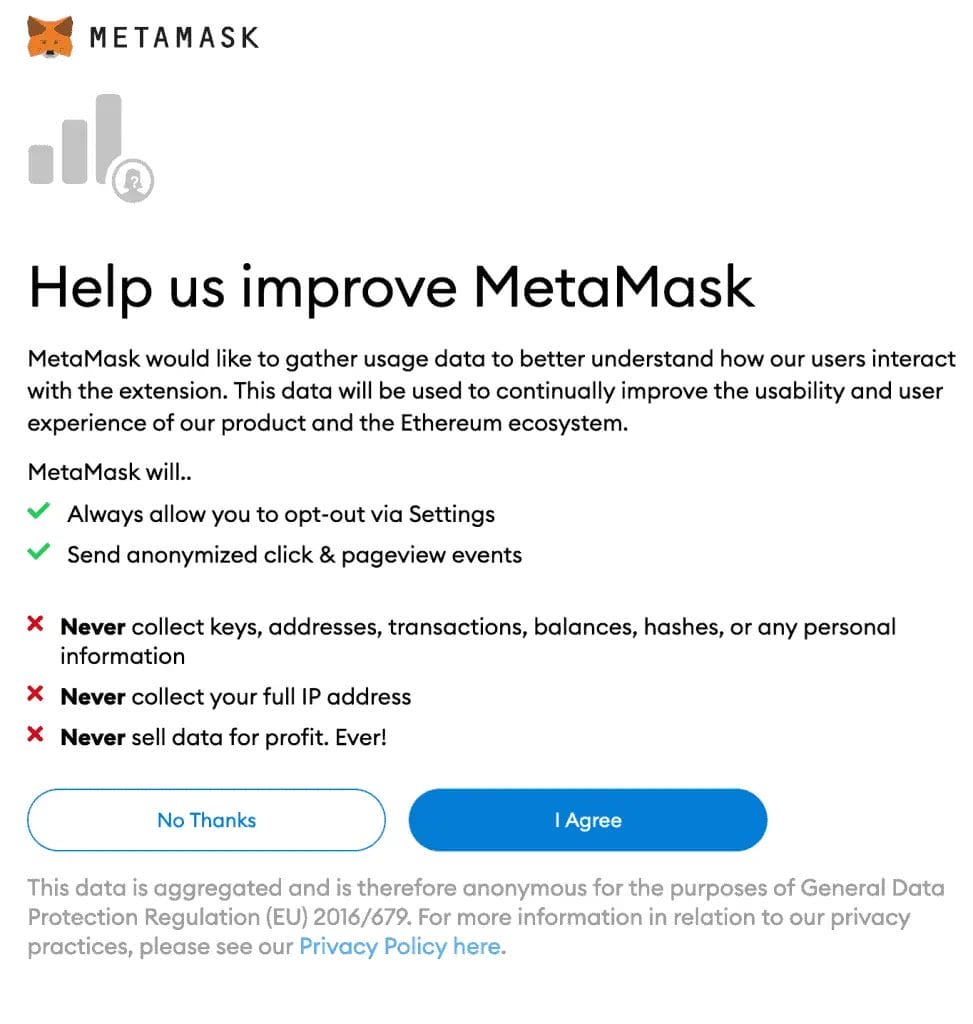
Step 6. Create a Secure Password
You will be prompted to enter a “New Password” with a minimum of 8 charters, then “Confirm password“, tick the box to agree to the Terms of Use and select “Create“.
Tip: It’s important to choose a secure password to protect your information and assets; one way you can do this is with a password manager such as LastPass.
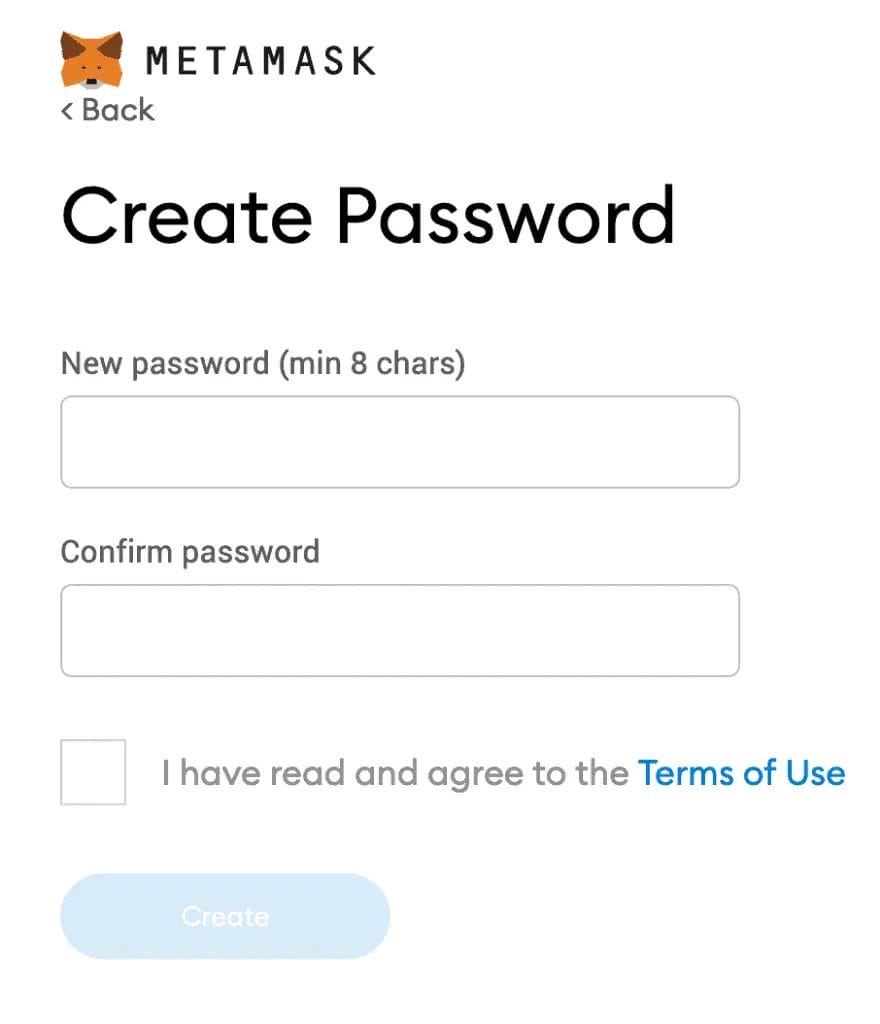
Step 7. Store Your Secret Recovery Phrase
This step is very important, as losing your secret recovery phrase may cause you to lose access to your MetaMask wallet. Please make sure you write down and safely secure your secret recovery phrase. Once written down, you can go to “Next“.
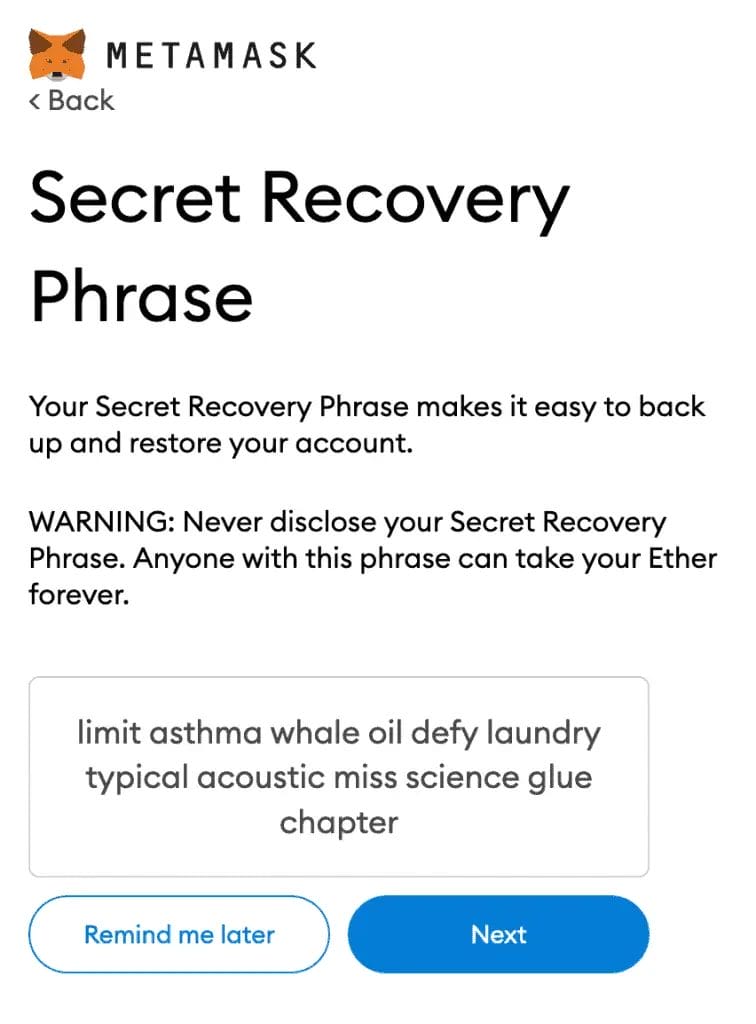
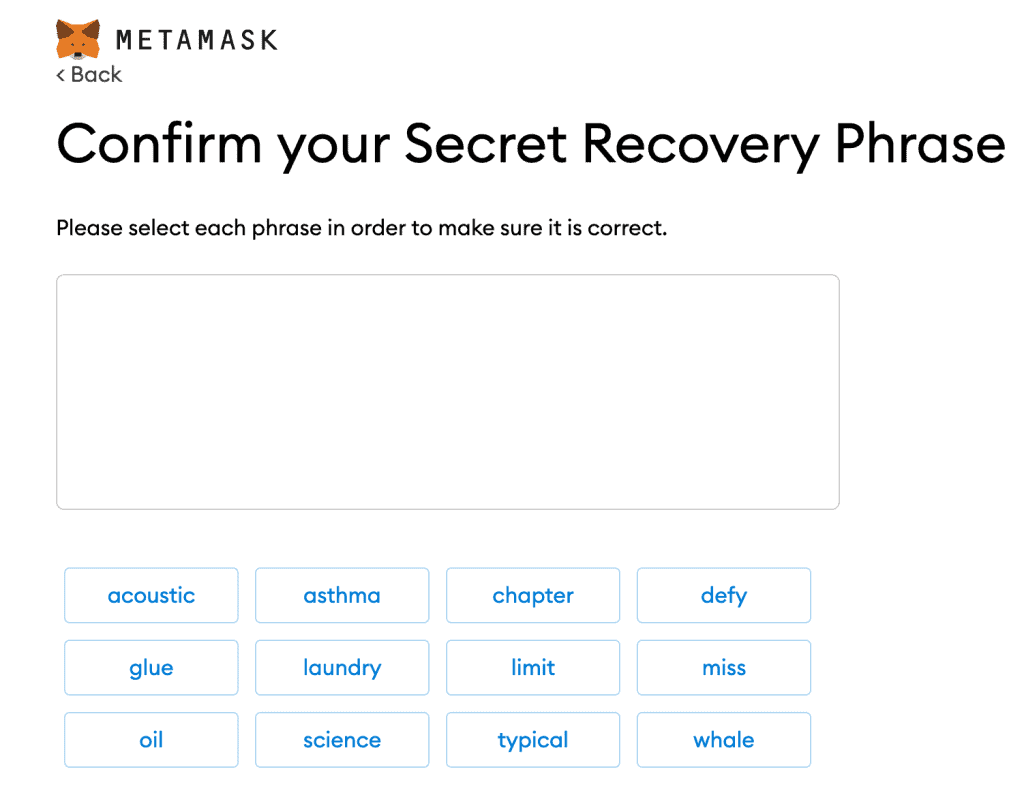
Step 8. Confirm Secret Recovery Phrase
You will need to confirm your Secret Recovery Phrase in order to ensure that you have written the phrase down correctly. Select the words at the bottom of the input field in the order they were in the previous step.
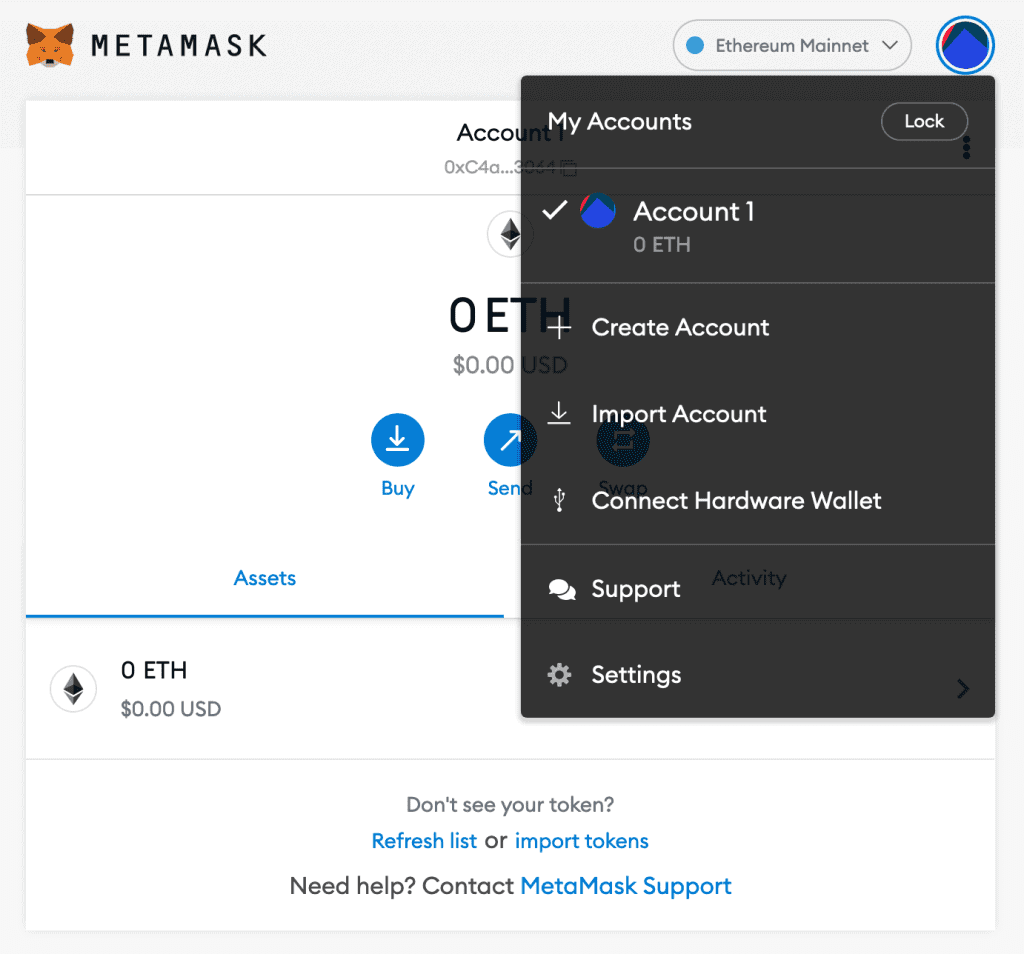
Step 9. MetaMask Account Created
Once you have confirmed your Secret Recovery Phrase successfully, your MetaMask account will be set up for you.
How to Add a Network to MetaMask
MetaMask was initially created as an Ethereum wallet. However, other layers 2 chains have been added to the wallet.
To add the likes of Binance Smart Chain or the Avalanche network, follow the below steps;
- Open MetaMask
- Click where it currently states “Ethereum Mainnet“.
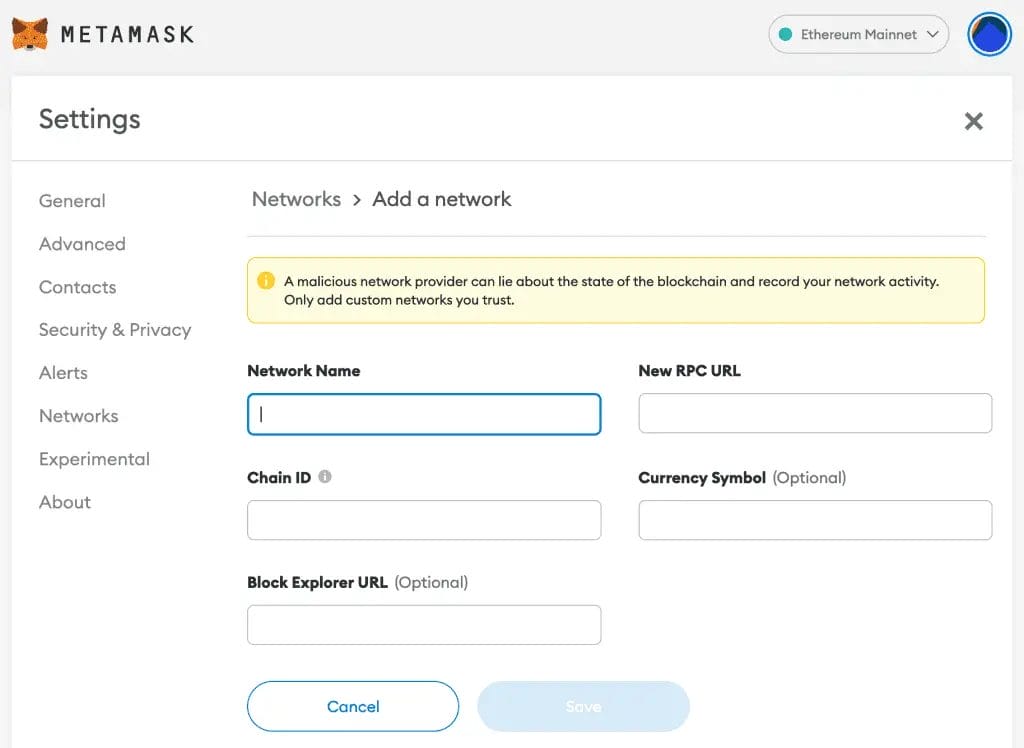
- Choose “Add Network“
- You will then need to complete the following for the network;
- Network Name
- New PRC URL
- Chain ID
- Currency Symbol (Optional)
- Block Explorer URL (Optional)
- Once you have added the network information correctly, choose “Save“.
The network will then be added to the list of networks available.
Add Custom Networks to MetaMask
- How to Connect Binance Smart Chain to MetaMask
- How to Connect Polygon (MATIC) to MetaMask
- How to Connect Avalanche to MetaMask
- How to Connect Arbitrum to MetaMask
- How to Connect Optimism to MetaMask
How to Recover a MetaMask Wallet
To recover your MetaMask wallet, you will need your Secret Recovery Phrase (SRP), also known as a seed phrase. This phrase consists of 12 words and should have been provided to you when you first created your wallet. Make sure to keep your SRP safe and secure, as it’s the only way to recover your wallet. Here are the steps to recover your MetaMask wallet:
- Open the MetaMask extension or mobile app.
- Click on the fox icon (if you are using the browser extension, click on “Restore Account” or “Import using account seed phrase” for the mobile app)
- Choose the “Restore Account” option again.
- Enter your MetaMask Secret Recovery Phrase (seed phrase) in the provided field.
- Create a new password for your wallet, then re-enter it for confirmation.
- Click the “Restore” button to restore your wallet.
Please note that importing a new Secret Recovery Phrase into MetaMask will remove all existing user data from the application. Ensure you have your SRP and any relevant information saved before proceeding.
What is MetaMask?
MetaMask is a free, self-custodial software crypto wallet designed for the Ethereum blockchain. Used to interact with decentralized Ethereum applications, which are also known as “DApps.” In March 2022, Metamask reported it reached over 30 million active users.
It was developed by ConsenSys Inc. in 2016, and in its first form, it was available as a browser
extension. Anyone with a Chrome or Firefox browser could use it to access the Ethereum blockchain.
It was later introduced for Brave and Edge browsers as well. In 2020, the company released the first
mobile app version of MetaMask. From that point, it was also available to Android and iOS users.
Initially, Metamask was created as an Ethereum-based wallet. However, more recently, the wallet has become popular with Ethereum Layer-2s like Arbitrum, Optimism and alternative networks such as Binance Smart Chain.
Conclusion
if you’re looking to engage in cryptocurrency transactions, NFT purchases, or interact with multiple blockchain networks, MetaMask is an excellent choice for a versatile and user-friendly crypto wallet. For an added layer of security, we recommend using MetaMask in combination with a Ledger hardware wallet to ensure the utmost protection for your digital assets.
FAQS
What is a Metamask Secret Recovery Phrase?
Your MetaMask Secret Recovery Phrase is a list of 12 words that is essentially the “master key” to your wallet and your crypto. Only you can access these words, and MetaMask cannot recover these.
You will need your Recovery Phrase for actions such as restoring your account. It’s important to keep your secret recovery phrase somewhere safe and away from any potential harm, as anyone with access to these words will have complete control over your wallet.
Tip: In the future, if you need to back up your MetaMask Secret Recovery Phrase, you can find it under “Settings” and then “Security“.
Should I share my MetaMask Secret Recovery Phrase?
It’s very important that you never share your Secret Recovery Phrase with anyone. Not even MetaMask. Anyone asking for your recovery phrase is likely trying to scam you and steal your crypto.
How do I save my Metamask Secret Recovery Phrase?
If you’re not too sure where to save your secret recovery phrase, here are some suggestions;
– Using a Password manager such as LastPass
– A Bank Vault Safety Deposit Box or a Safe
– Write them down and store the words in multiple secret places
Is it free to create a MetaMask wallet?
Yes, it is free to create a MetaMask wallet. MetaMask is a free web3 wallet that can be used as a gateway to access popular DApps and Web 3 services.
How do I create a wallet in MetaMask mobile?
To create a wallet in MetaMask mobile, follow these steps:
1. Download the official MetaMask app from your device’s app store.
2. Once installed, open the app and follow the prompts to create your wallet.
3. Make sure to back up your Secret Recovery Phrase somewhere safe and offline.

