In this guide, you will learn how to add Avalanche to a MetaMask wallet and how to connect with DApps such as Sushiswap, Trader Joe and Pangolin.
It´s becoming increasingly frustrating using the Ethereum network due to the sky-high fees. However, you can reduce these ETH GAS fees by avoiding the Ethereum network altogether and connecting to alternative blockchains such as Avalanche, Binance Smart Chain and Polygon.
Before you start using these alternative networks, you will need to connect to a supported wallet. One of the most popular wallets is MetaMask, where you can also connect a Ledger and Trezor hardware wallet.
How to Add Avalanche Network to MetaMask?
Step 1: Download MetaMask
To start connecting Metamask to Avalanche, make sure that MetaMask is installed on your device. Installing MetaMask will not be discussed in this thread, but you can check out our tutorial to see how to set up MetaMask on your selected device.
Step 2: Add Network to MetaMask
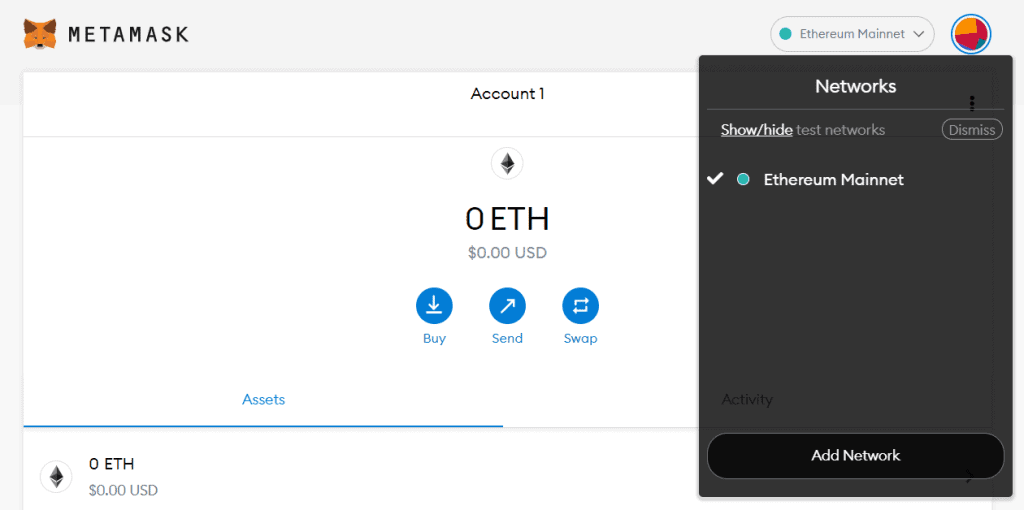
Once MetaMask is installed, open your MetaMask wallet. After opening the wallet, click the dropdown beside the connected network name (usually set to Ethereum Mainnet). Then select “Add Network“.
Step 3: Add Avalance Network to MetaMask
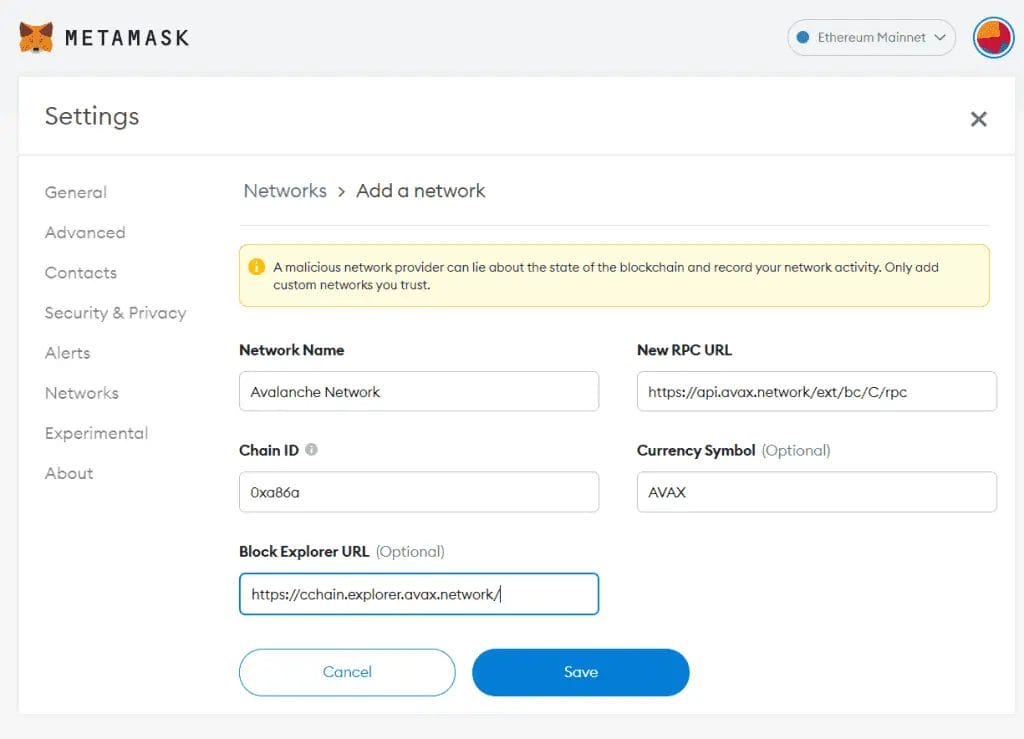
You will be directed to the “Add Network” page. To proceed, type in (or copy and paste) the below information to the appropriate box.
This information was updated on 26/01/22; you can check the Avalance site for the most up-to-date information.
- Network Name: Avalanche Network
- New RPC URL: https://api.avax.network/ext/bc/C/rpc
- Chain ID: 43114
- Symbol: AVAX
- Explorer: https://snowtrace.io/
Step 4: Save
After inputting, click save, and your MetaMask wallet is connected to the Avalanche Network. Congratulations!
What is MetaMask?
MetaMask is a cryptocurrency wallet and gateway to blockchain-based apps. The wallet is available as a browser extension for the likes of Chrome, Firefox, and Brave or a mobile app for Android or iOS. By standard, MetaMask is used on the Ethereum network. However, MetaMask can also be set up to connect to the likes of the Avalanche Network or Binance Smart Chain.
If you would like to find out more information, check out our step-by-step MetaMask tutorial.

What is the Avalanche Network?
Avalanche (or AVAX) is a blockchain platform that was launched in 2020 by the Ava labs team based in the US. Offering fast transaction speeds at low costs, plus its open source, allows the building of decentralised applications known as DApps.
Avalanche differs from other networks due to its unique approach by using 3 separate blockchains in its platform. These are named X-Chain, C-Chain, and P-Chain.
- X Chain is their exchange chain for creating and exchanging AVAX tokens and other digital assets. Fees are paid in their AVAX token, similar to how you would pay ETH for the Ethereum network or BNB for the Binance Smart Chain.
- C Chain is their contract chain where essentially, developers create smart contracts for DApps.
- P Chain or Platform chain, which coordinates the network validators, tracks active subnets and allows for the creation of new subnets.
Because each blockchain has a different function, this helps improve Avalanche’s speed and scalability.
AVAX Avalanche Tokens
Avalanche has its own AVAX utility token, which essentially brings all the blockchains together. AVAX has a capped supply of 720 million and can be staked to validate the network, used for transaction fees and used as a unit for all the subnets.
How to Send AVAX Tokens to MetaMask?
When you have connected the Avalanche network to your Metamask wallet, you’ll need to learn how to send AVAX tokens to Metamask. These can be sent across using a bridge to send your tokens across to the avalanche network or by buying and sending these from exchanges such as Binance.
Just be aware that when bridging your tokens from Ethereum to the Avalanche network, will require ETH for GAS fees.
How to Bridge AVAX Token
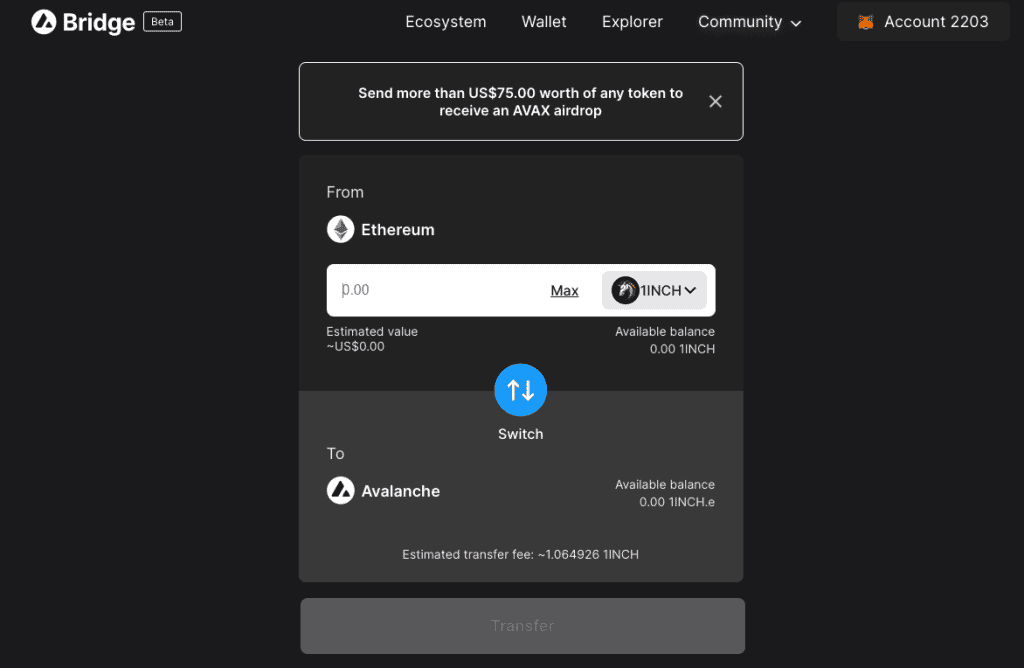
Step 1: Navigate to the Avalanche Bridge & Connect
To bridge your tokens from Ethereum to the Avalanche network, you can use Avalanche’s own bridge, which can be found at the bridge.avax.network.
Step 2: Connect your Wallet
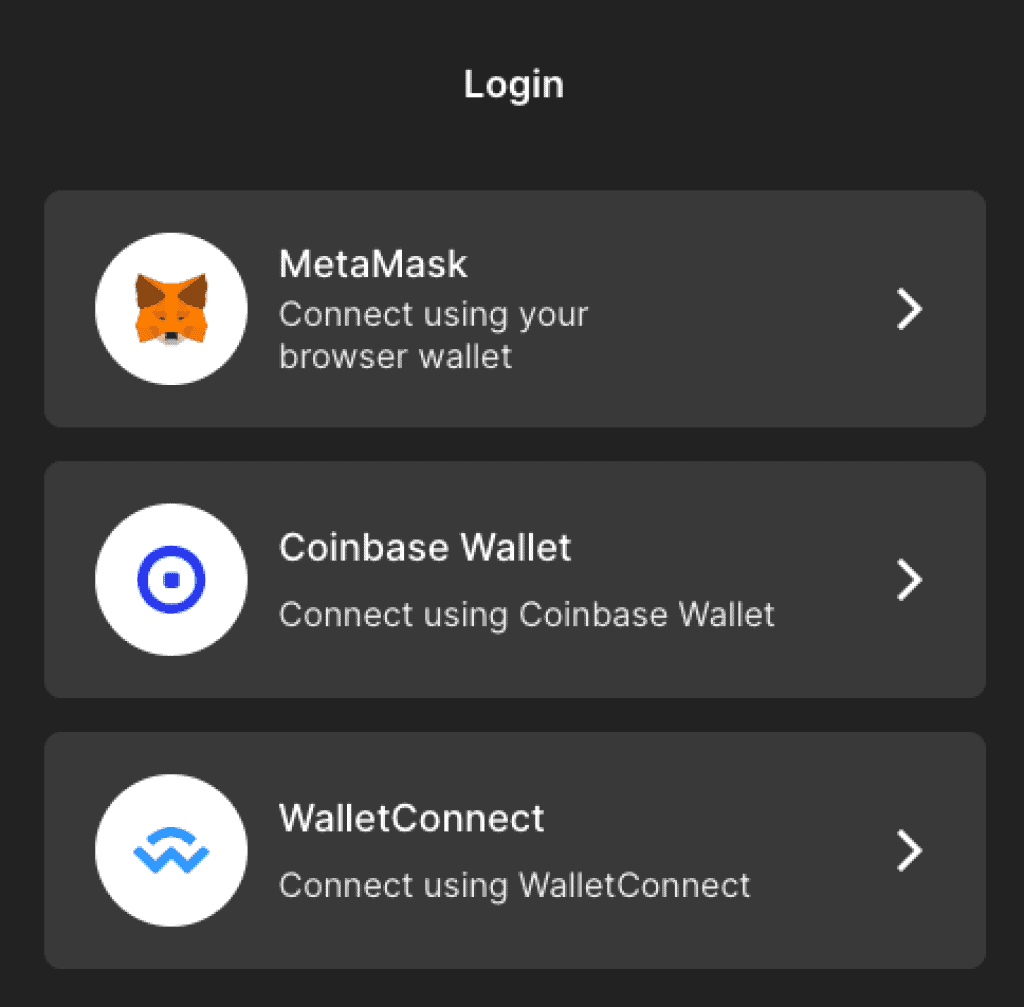
From the Avalanche Bridge, you’ll need to connect up to your Metamask wallet, which has your Ethereum ERC20 tokens in there.
Step 3: Select your Tokens
Once connected, you can select the token that you want to bridge from the dropdown, which can be any Ethereum-based ERC20 token.
Step 4: Enter the Amount & Transfer
Enter the number of tokens you’d like to bridge across. Currently, when you bridge more than $75 in tokens, you will get a free airdrop. Then when you are ready to bridge, choose “Transfer“.
Once complete, your tokens will move from the Ethereum network to the Avalanche network. You will also find that the name of the token will change to having a “.e” at the end of it.
Another way to bridge your tokens is using something like cBridge. So if you have your tokens on Ethereum, Arbitrum, or the Binance Smart chain, you can bridge to Avalanche, so you’re not restricted to just bridging from one network.
How to Send AVAX from Binance Exchange?
The easiest way that I personally use to send AVAX tokens to Metamask is simply buying these and withdrawing them from the likes of the Binance Exchange.
If you’re not too sure how to withdraw from Binance, you can follow our tutorial and guide on “How to Withdraw from Binance“.
Just ensure that when withdrawing from Binance, you use the AVAXC network.

2 responses
Why is the information to add Network on MM different on the Avalanche website under how to set up? It is listed as below
Network Name: Avalanche Network
New RPC URL: https://api.avax.network/ext/bc/C/rpc
ChainID: 43114
Symbol: AVAX
Explorer: https://snowtrace.io/
Thank you for this, we have updated our own details and put a link to Avalanche.